Marantz PM66SE Amplifier Repair
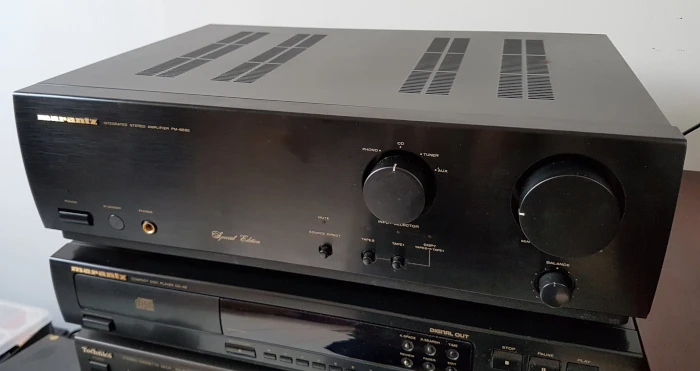
This Marantz PM66SE (Special Edition) was given to me by a friend as he hadn't used it for a few years. The PM66SE was released in 1997 and it received favourable reviews at the time, with excellent sound quality for the price.
It was working when I received it however there were some issues. It seemed to be low in output and the balance of the speakers wasn't even, although it we still usable with the balance control adjusted to one side.
I used it for a while until the speaker protection relay started tripping periodically and eventually it wouldn't power up, so it was time to open it up.
Research
The service manual was easy to find on-line and there were some very useful forum posts and videos (here & here) which describe similar or common problems with these amplifiers.
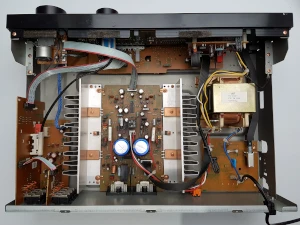
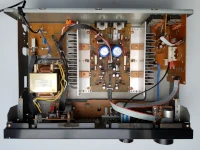
Disassembly
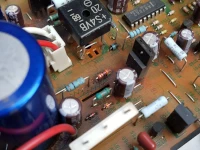
After opening it up and taking out the main board, an initial inspection revealed a few obvious things to investigate:
- a stacked resistor, what looked like a previous lazy repair!
- nasty looking glue around the smoothing capacitors, which was spread over one of the resistors
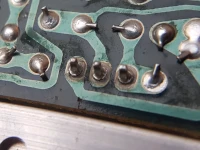
- numerous dry/cracked solder joints on the under side of the main PCB
- the fuse at the power input was black, which explained why it wasn't powering up anymore
Repairs
Stacked Resistor - Position: R802
After referencing the service manual it was evident that the stacked resistor from the previous repair was bridging a blown fusible resistor, however it had an incorrect rating of 18Ω. It should have been a 47Ω 0.25W fusible resistor, so this was probably the cause of the balance issue. A fusible resistor with of the correct rating was sourced (FRN25J47R) and fitted.
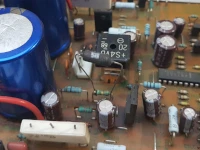
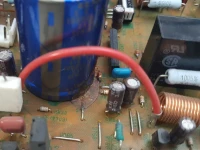
Glue Contaminated Resistor - Position: RN12
To gain access to the glue covered resistor, one of the large smoothing capacitors had to be removed temporarily. With it out of the way, the offending glue could be carefully scraped away. After removing the contaminated resistor I could see that the glue had corroded some of the contact on the under side of the PCB but there was just enough to solder a new resistor on to. The service manual was referenced and a new 100KΩ resistor was fitted.
Dry Solder Joints
Numerous dry/cracked solder joints on the main board were re-soldered, mostly at the power input, speaker terminals and output transistors. Apparently this is a common problem with these amplifiers as they age.
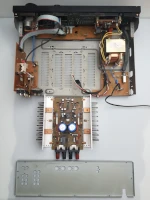
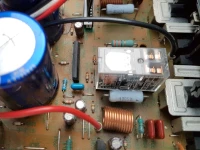
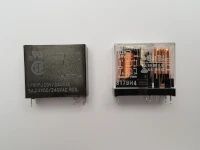
Speaker Protection Relay - Position: LN01
Based on the various posts by others, it is advised to replace the speaker protection relay on these old amplifiers. The contacts become oxidised over time, causing them to trip, especially at low volumes.
The original Takamisawa 24 VDC 5 Amp DPST-NO (Double Pole Single Throw - Normally Open) relay is discontinued but there are others with similar specifications. I should have ordered a DPNO (Double Pole Normally Open)(G2R-2A 24DC) relay but in error I ordered the DPDT (Double Pole Double Throw)(G2R-2 24DC). The DPDT has two additional contacts and pins for the Normally Open position, however since they are not used in this scenario the relay behaves the same as a DPNO once these pins are removed.
Mains Fuse - Position: F001
There were a few dry solder joints on the mains power board. A new T1.6A Amp 250V slow-blow fuse was sourced and fitted.

Adjustment & Testing
After reassembling the main board and back plate (which provides a common ground between the board and the chassis) it was ready to power up. Thankfully, the new speaker protection relay engaged as expected, and staying engaged while powered.
The service manual describes how to measure (the voltage across R767 & R768) and adjust the idling current via the adjustable resistors (at R755 & R756). The values were quite close to the desired 14 mV, requiring only minor adjustment after the amplifier had warmed up.
The output voltage at the speaker terminals was also checked and found to be 8 mV at both channels, well within acceptable limits.
Conclusion
The amplifier is now back on the stand where it belongs and it sounds great, the balance problem has been resolved and its output level is back to normal. The parts cost about the same as a sandwich and it was an interesting project to work on, so well worth doing. Hopefully it will last for a few more years.