Building a Musikding Big Muff American Clone Guitar Pedal Kit
Der Muff American kit from Musikding is based on the famous Big Muff fuzz / distortion guitar effect pedal which is commonly used in alternative, garage rock and grunge music.
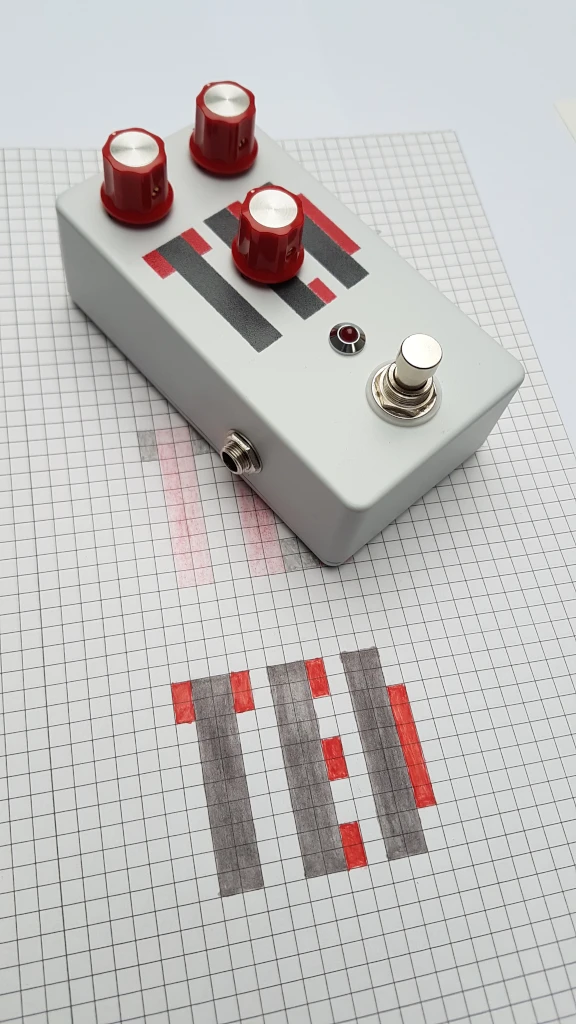
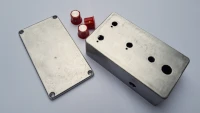
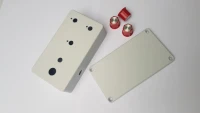
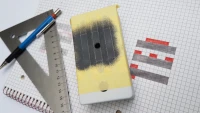
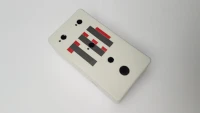
The base kit can be purchased without a pedal enclosure and knobs, however they provide an option to purchase a blank or pre-drilled 125B enclosure, and they also stock a wide variety of knobs. I opted for a pre-drilled enclosure and three red fluted silver center bakelite knobs.
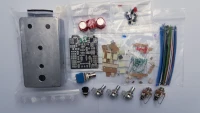
The build documents are available on their website, these include: Installation guide, Schematic & Parts list.
Preparing the Enclosure
The potentiometers have a tab protruding from their base, to prevent the base from spinning when they're in use, however there were no matching slots in the enclosure. The instructions suggest snapping the tabs off with pliers as they probably aren't needed if the nut is tightened sufficiently. However, I prefer to fit things right so I drilled an additional small hole for the tab beside each existing hole. These smaller holes are not visible when the knobs are installed.
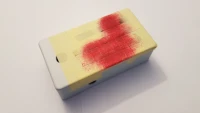
I sprayed the enclosure with several coats of light grey paint. This pedal is for a friend so it got a stenciled paint job using acrylic paint, finished off with a few coats of matt clear coat spray.
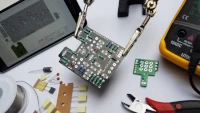
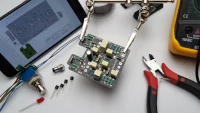
Assembling the PCB
Soldering the components to the main PCB is relatively easy, everything is clearly labeled so it's a typical assembly, going from lowest to highest parts; resistors & diodes to capacitors.
The footswitch has a separate PCB which keeps the wiring tidy, the LED is also connected to this board when it is mounted.
Assembling the Pedal
The installation guide suggests fitting the LED & bezel before the footswitch. This makes it quite fiddly to get the LED pins through the holes on the underside of footswitch PCB, it's like shooting in the dark so this takes some patience. I found that you can take the LED out of the bezel, insert it into the holes in the PCB and then fit it with the footswitch PCB, using a small flat screwdriver to push down the plastic insert into the bezel afterwards.
Things are tight once the main PCB is installed, I left some length in the off-board wires so that I can take the PCB in and out without having to de-solder the wires.
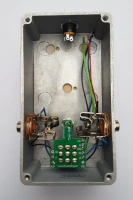
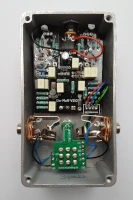
In general, the build was straight forward, however I did run into one issue with this kit. When I plugged it into my amp there was a very loud buzzing noise. Thankfully I didn't have it turned up loud so no damage was done. I suspected a short or something not grounded properly, after re-examining all the connections and scratching my head for about an hour I finally resolved the issue. The kit had been supplied with two stereo jacks instead of one stereo jack and one mono jack. I had followed the wiring diagram but the lugs have a different layout, so I had unknowningly wired them the wrong way around. After a bit of re-soldering, which can be seen by comparing the two images above, the pedal worked as expected.
Time to play
A short demo of the pedal in action:
The End Result
Compared to my original EHX Big Muff Pi, I found the Der Muff to be slight brighter which isn't a bad thing, overall I'm very happy with the way it sounds.